Table of contents
Required parts
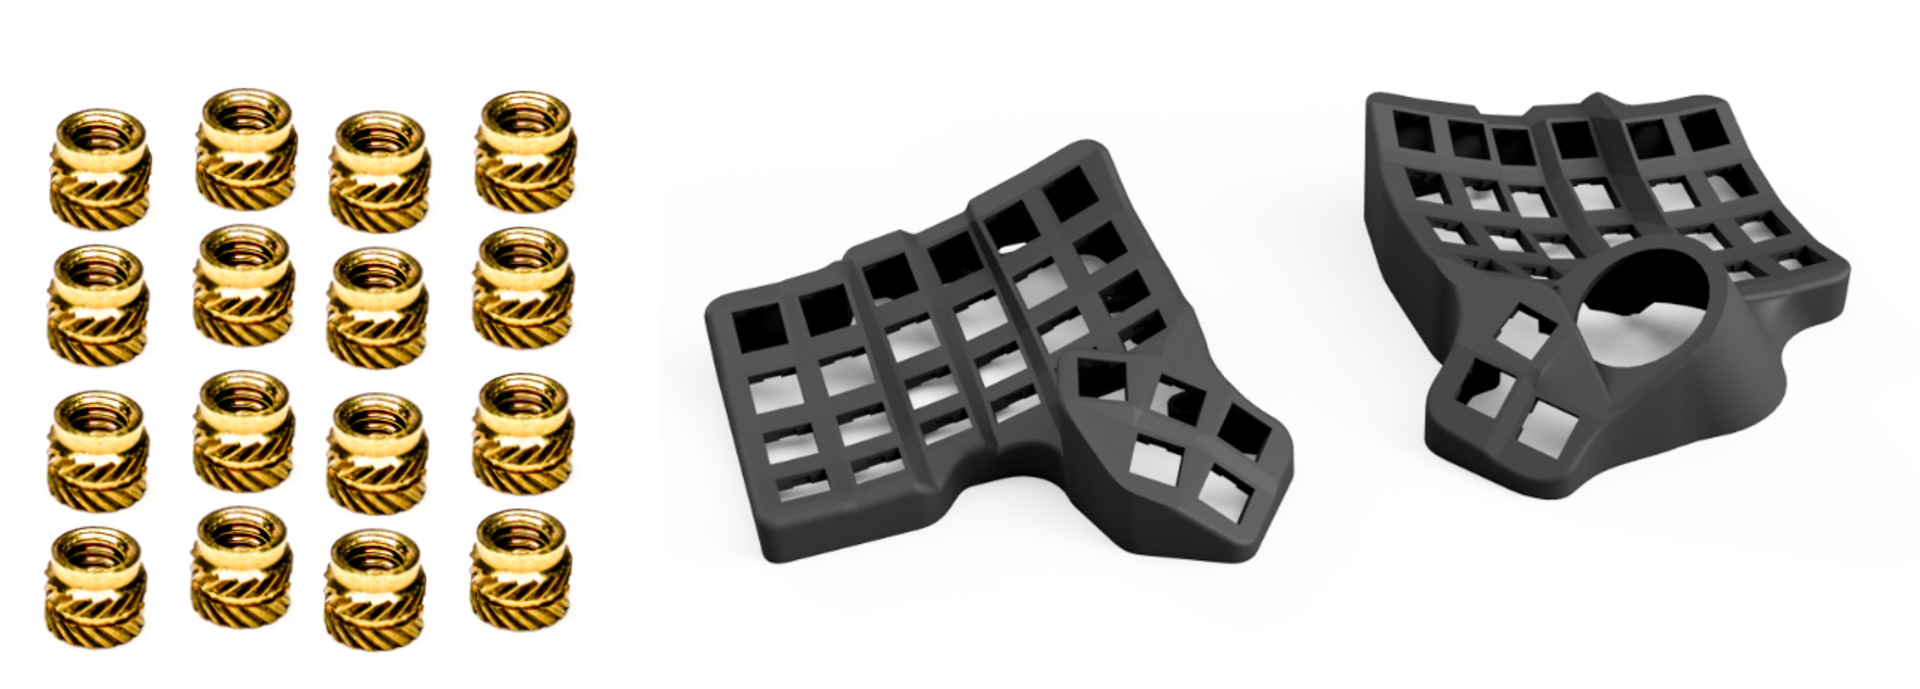
For the following step, please prepare:
- M4 screw insert (x16)
- 3d printed case (left)
- 3d printed case (right)
There are smaller screws and screw inserts (M3) in your kit. You can set those aside, we will use them later.
There are other 3d parts in your kit like plates, tents, 3d holders. You can set those aside, we will use them later.
Screw inserts - outer
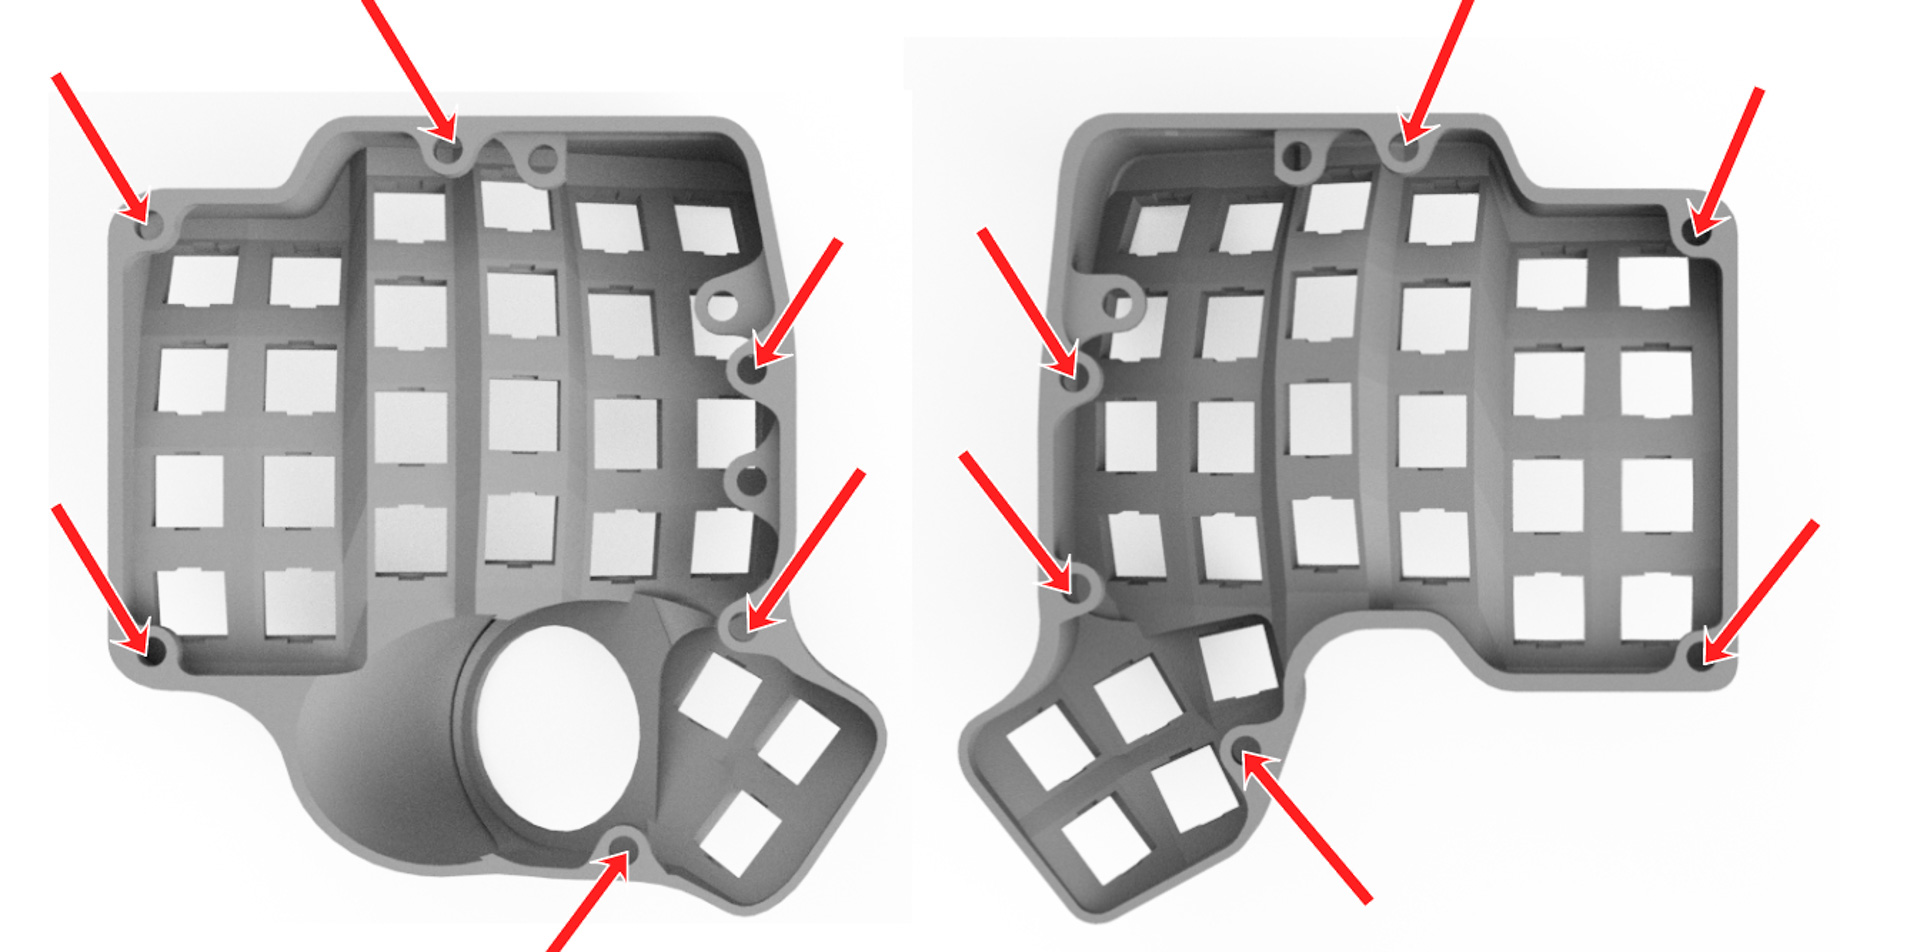
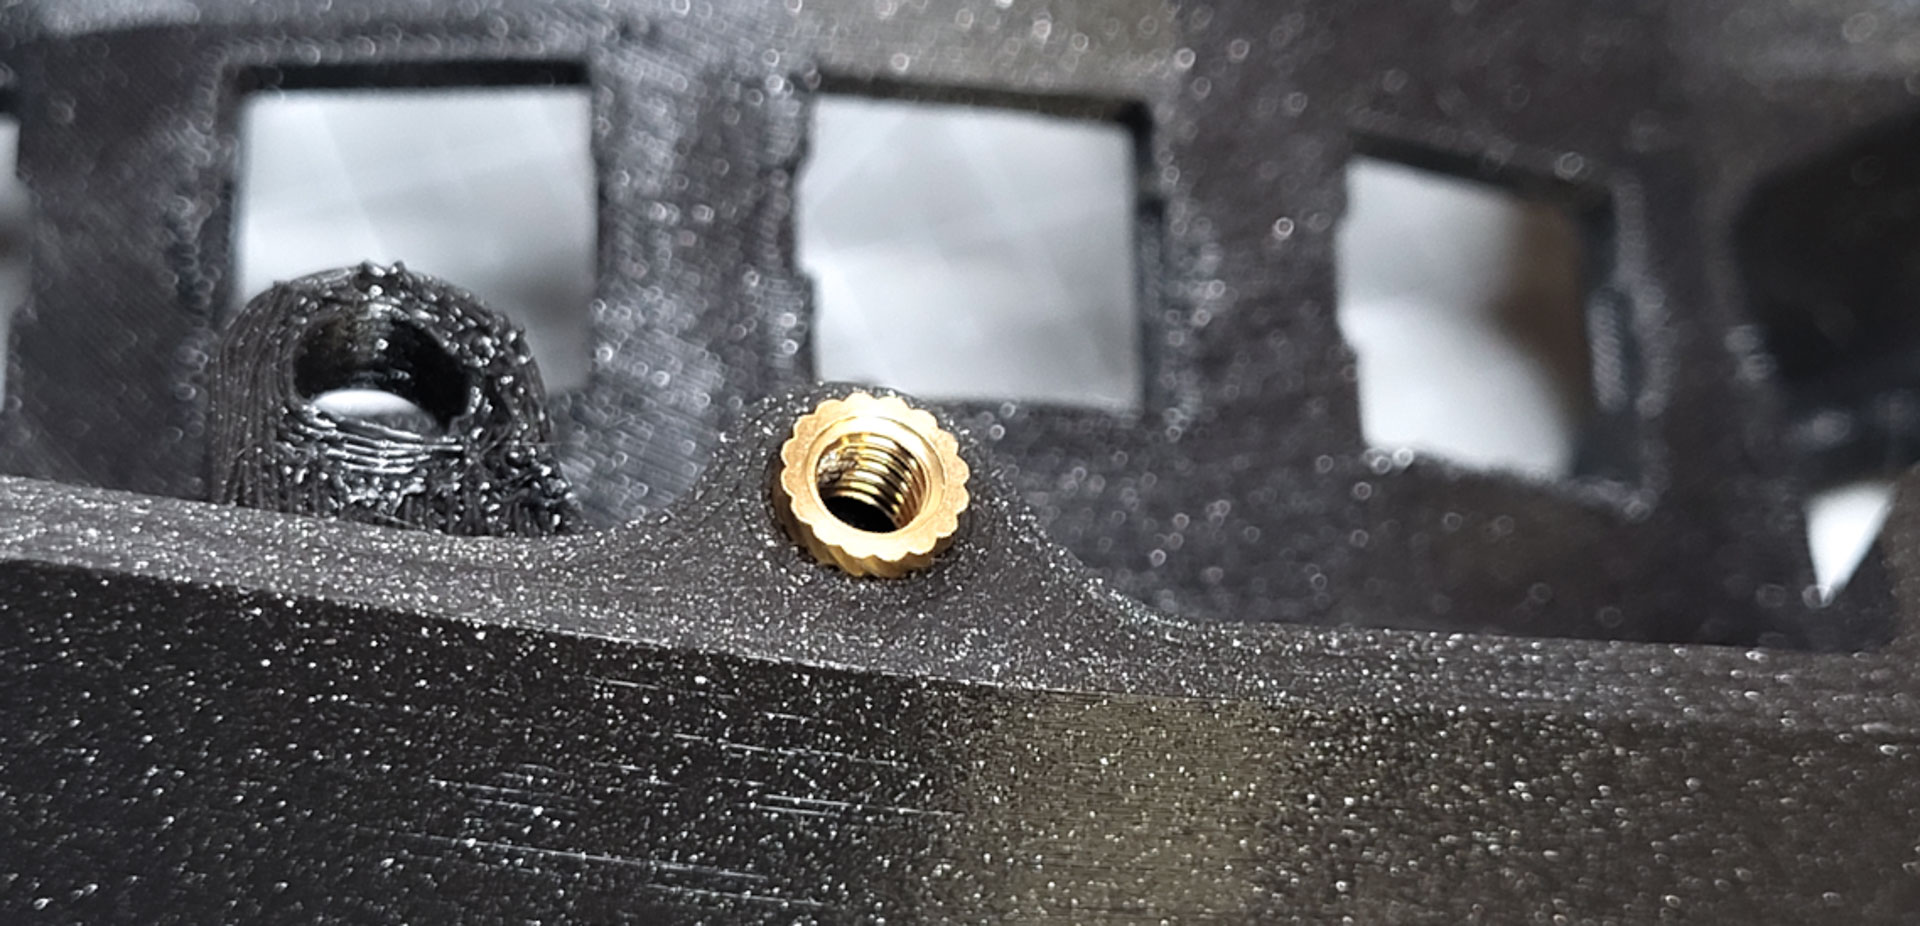
First, we will install the screw inserts on the outer edges of the case. There are 6 on each side. Use the below pictures to identify them.
Be careful when installing the screw inserts, you can damage the case. Read all the instructions first, then proceed to the installation.
- Set your soldering iron temperature to 250 degrees Celsius
- Using the soldering iron, place the heated insert inside the hole
- Place the smaller side of the insert towards the case. This helps guide the insert in
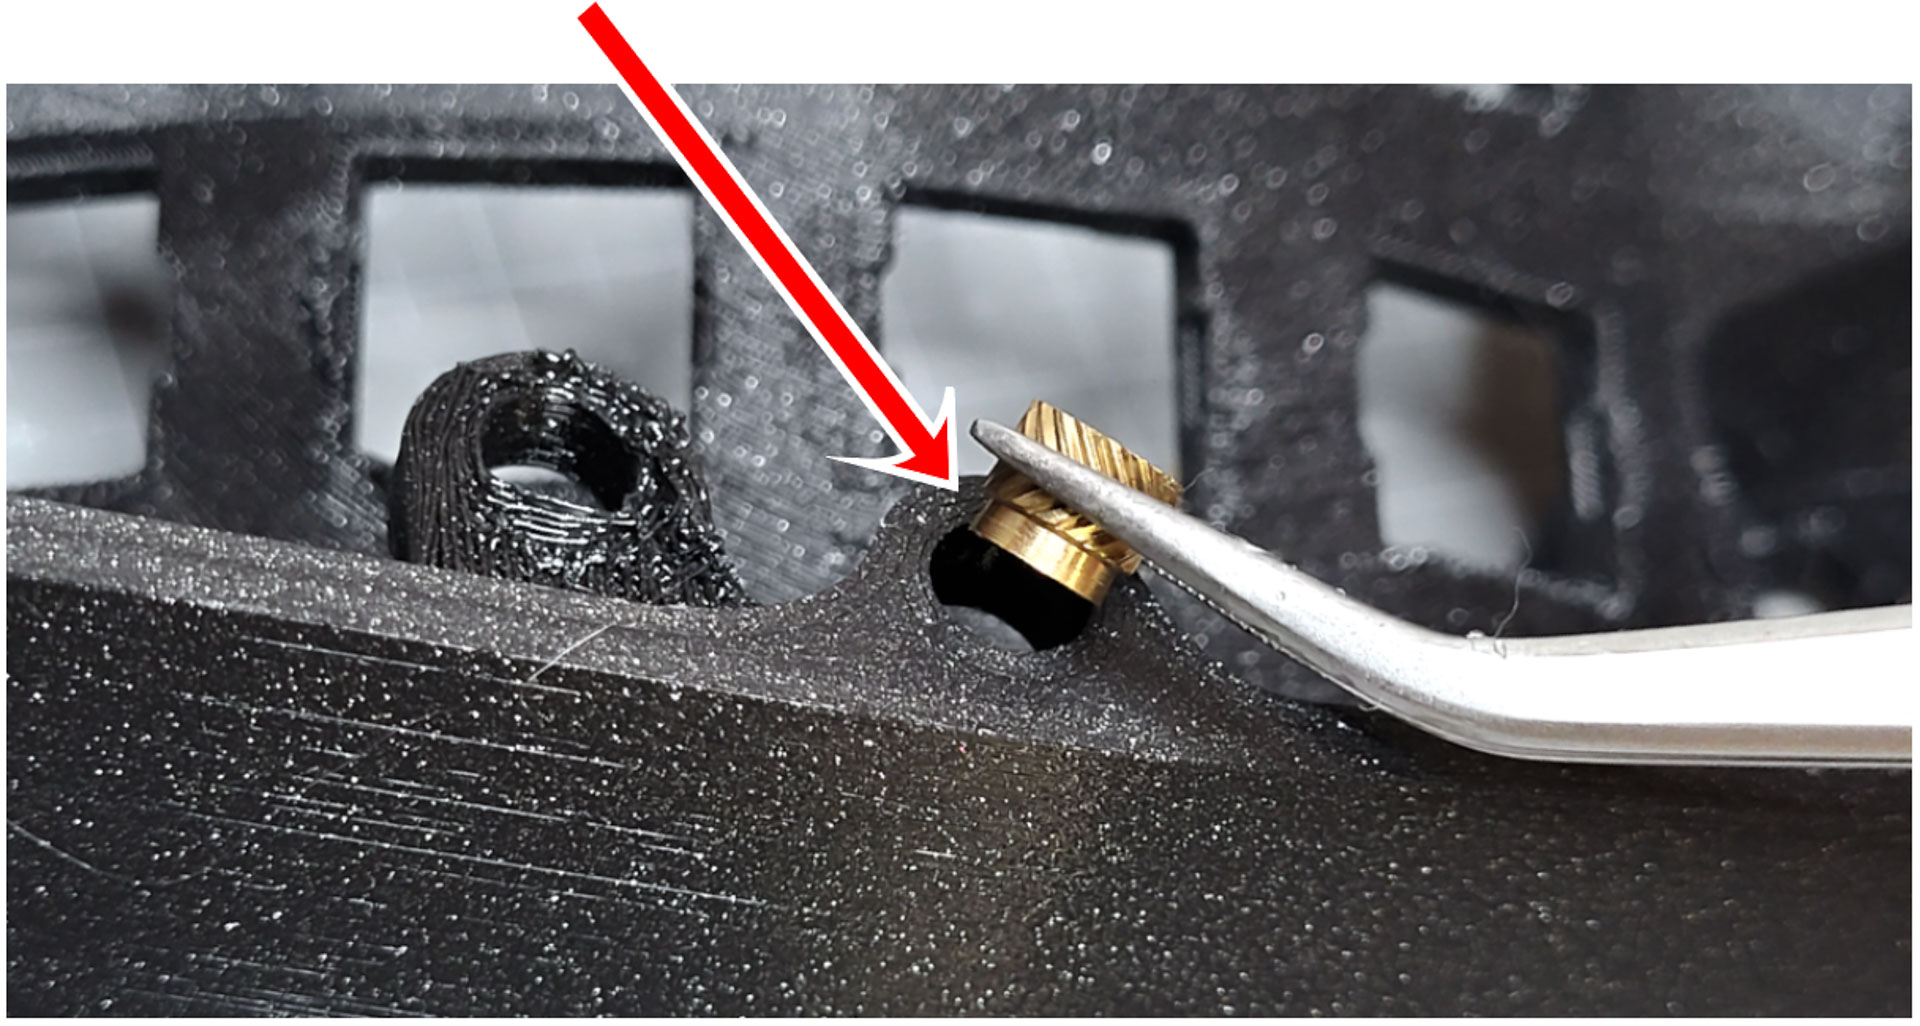
- Apply little to no pressure, let the gravity do the work. Otherwise, you might push them too far
- If the insert doesn’t fall into place, you can slowly increase the temperature, but don’t go over 350 degrees
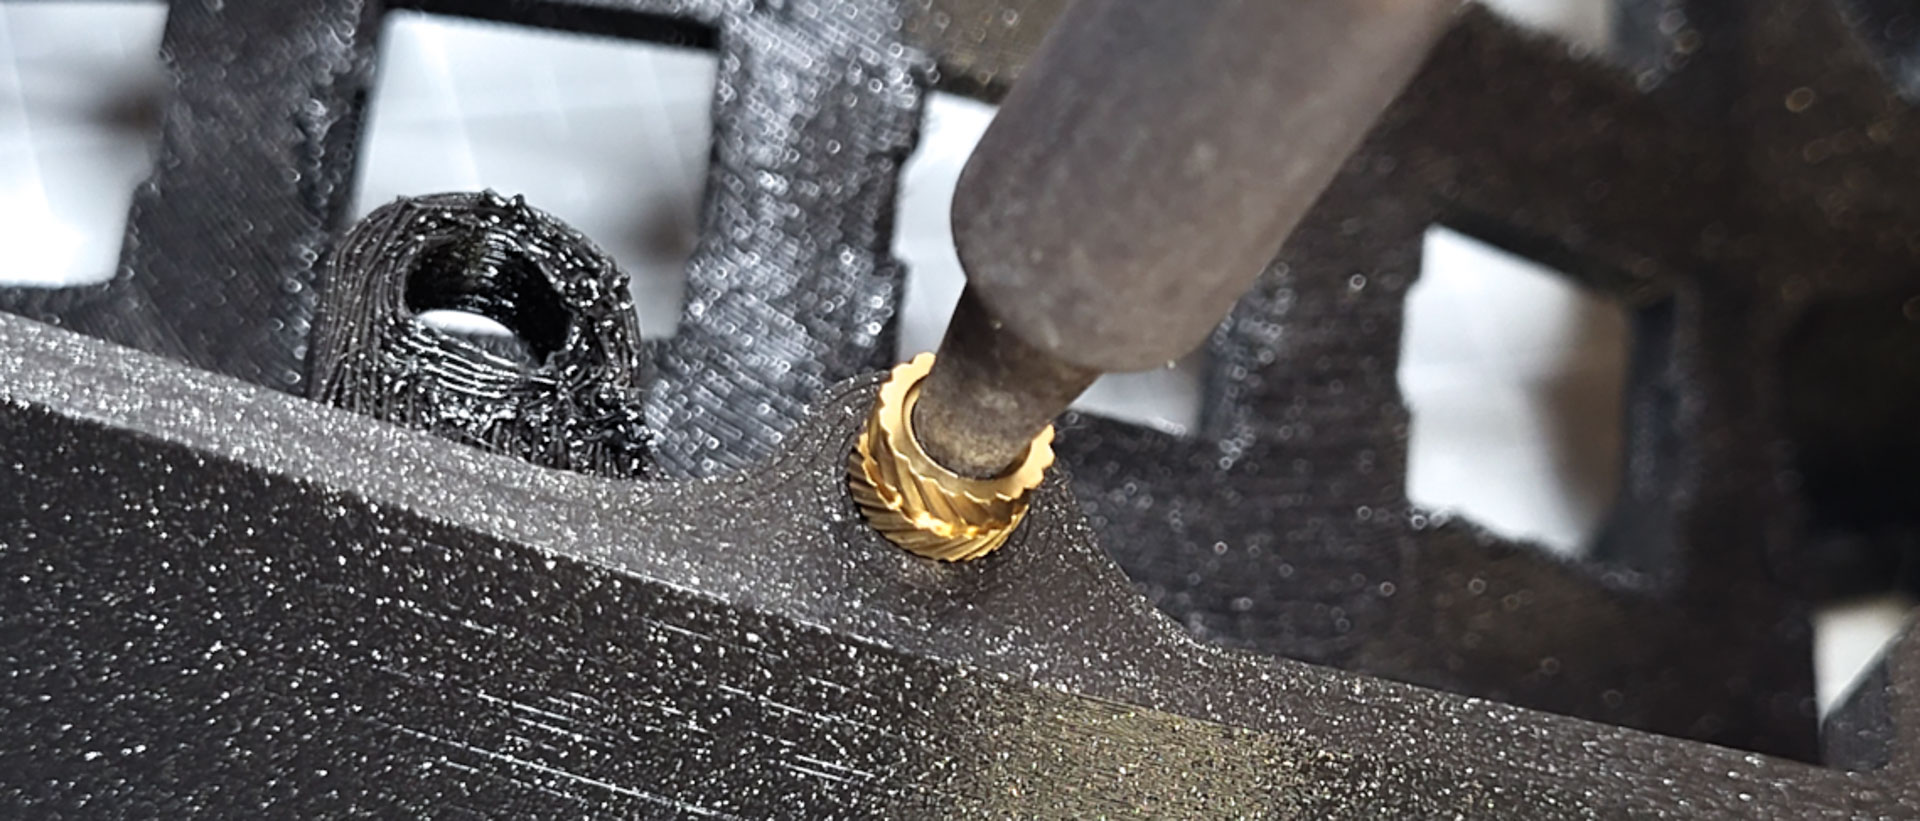
- Once the insert is 2/3 of the way in, stop
- Flip over the case and gradually push it against a flat surface, to make the insert flush with the case
Screw inserts - inner
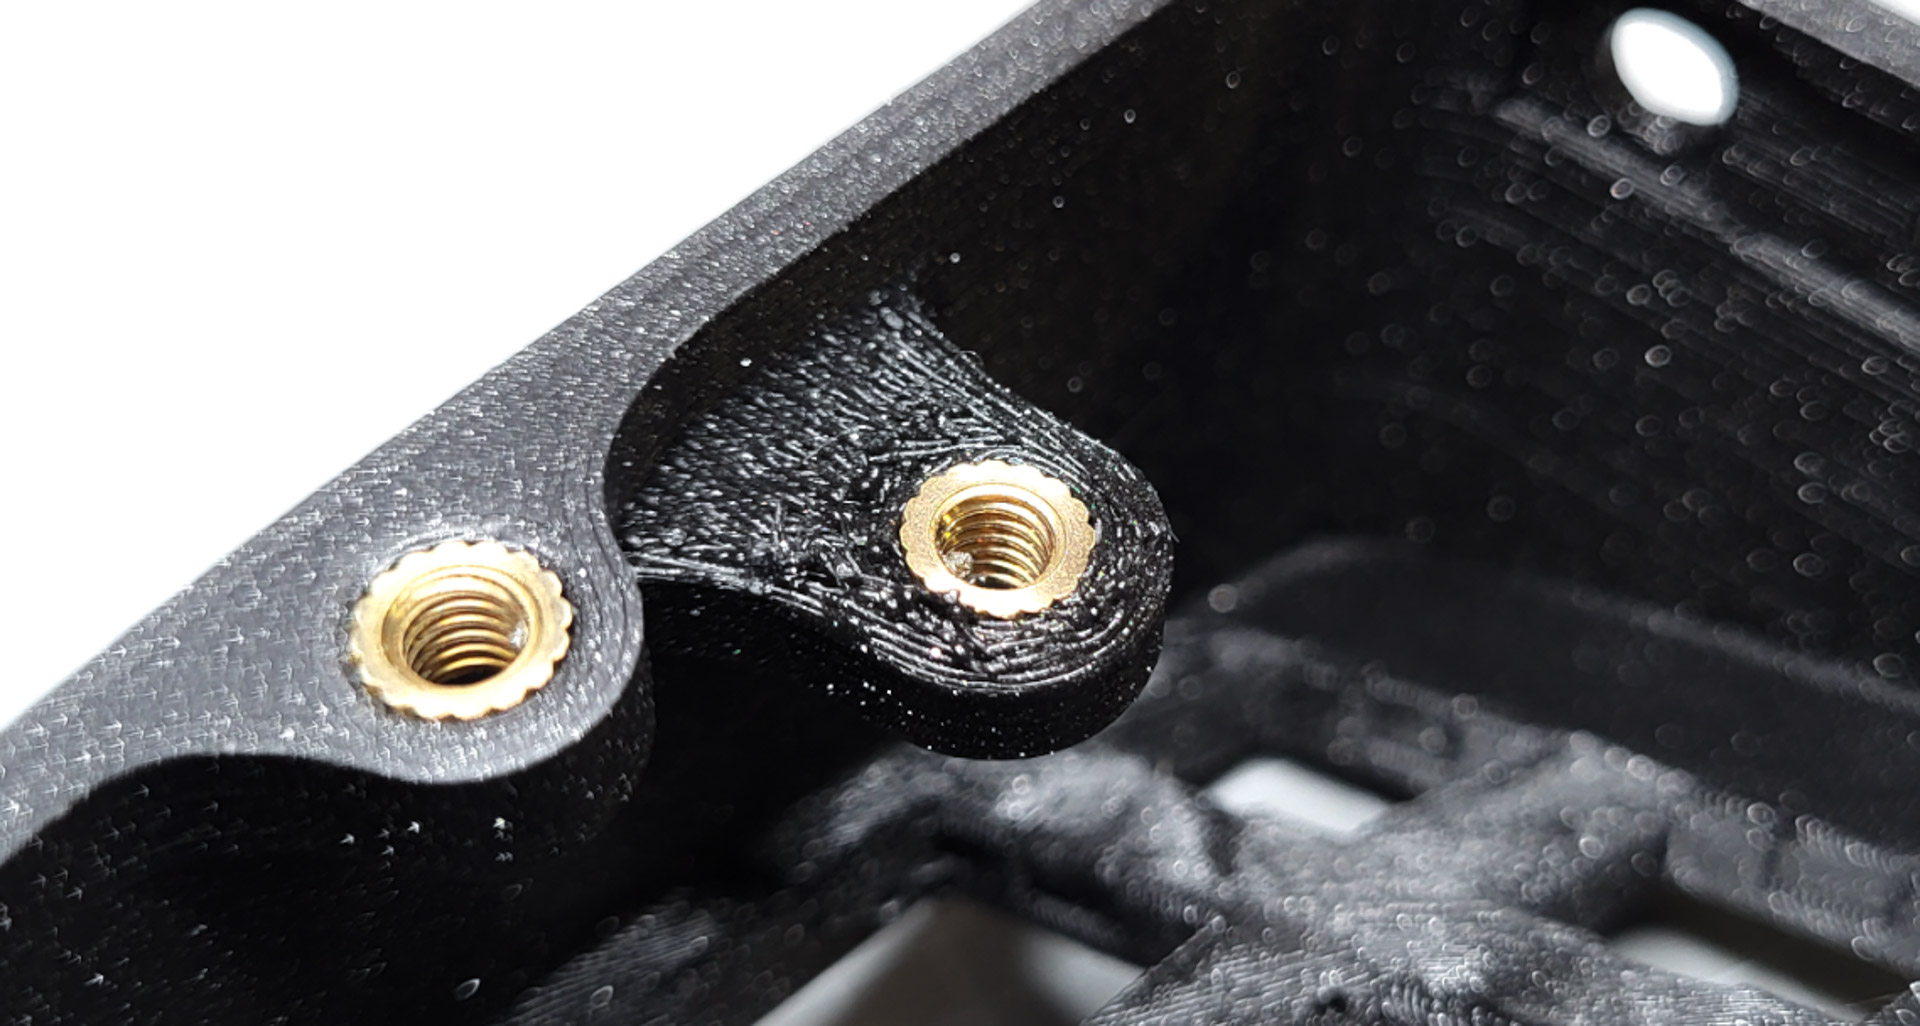
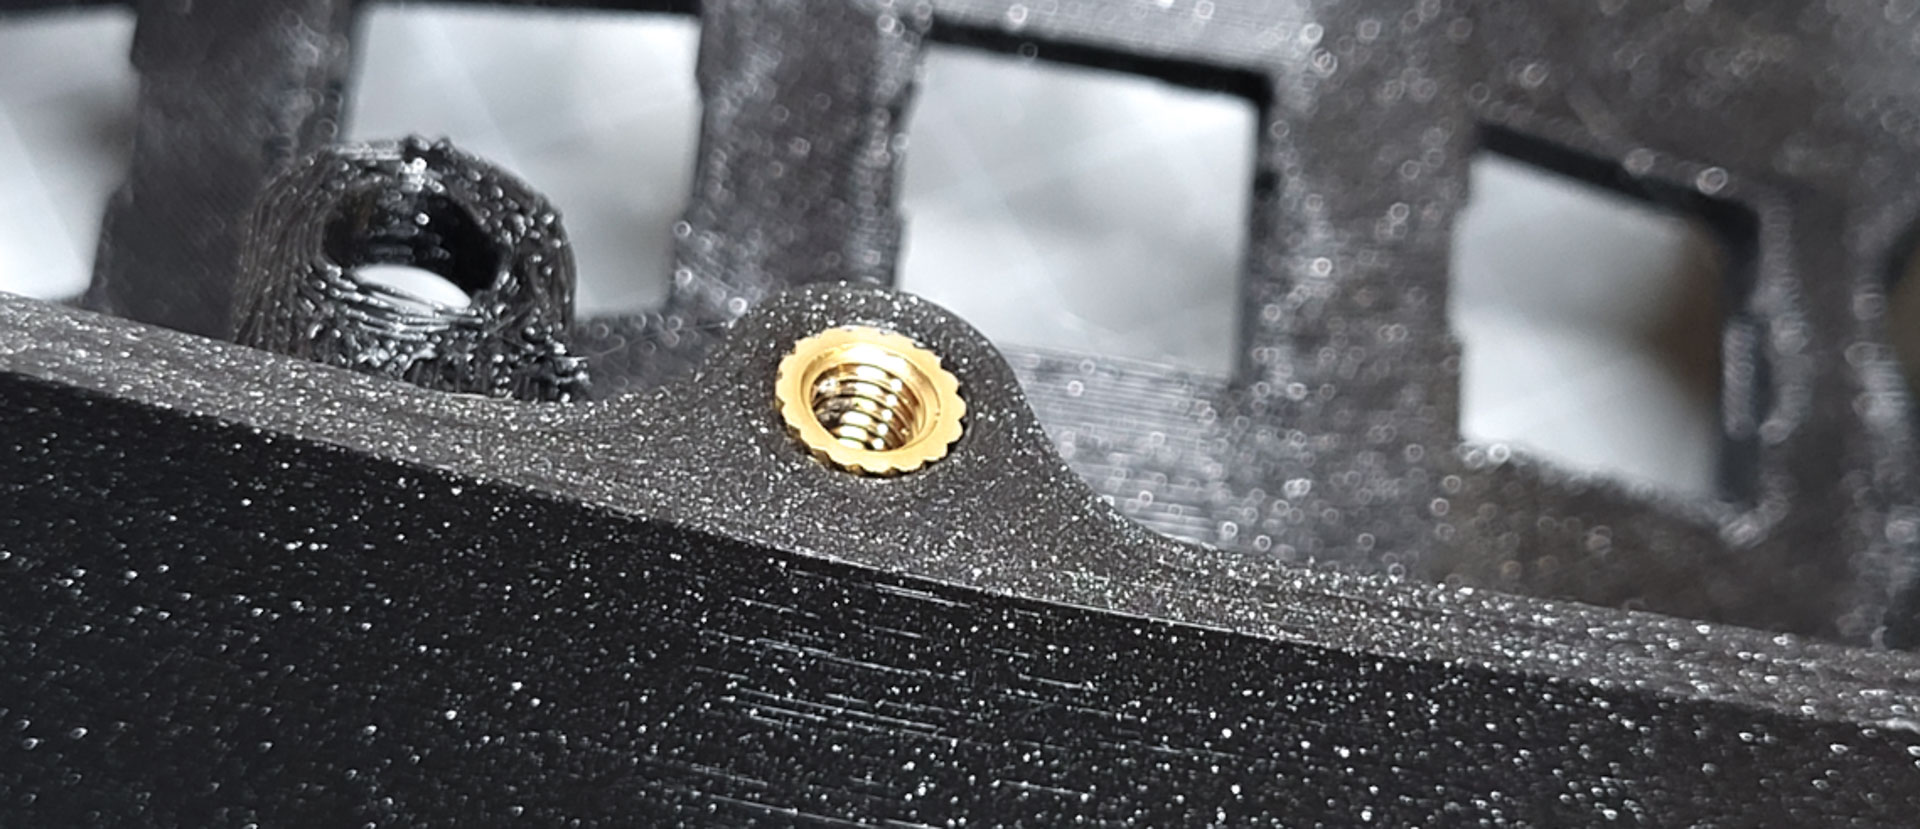
We will now install the screw inserts that will later hold the controller. There are 2 on each side. Use the below pictures to identify them (in red).
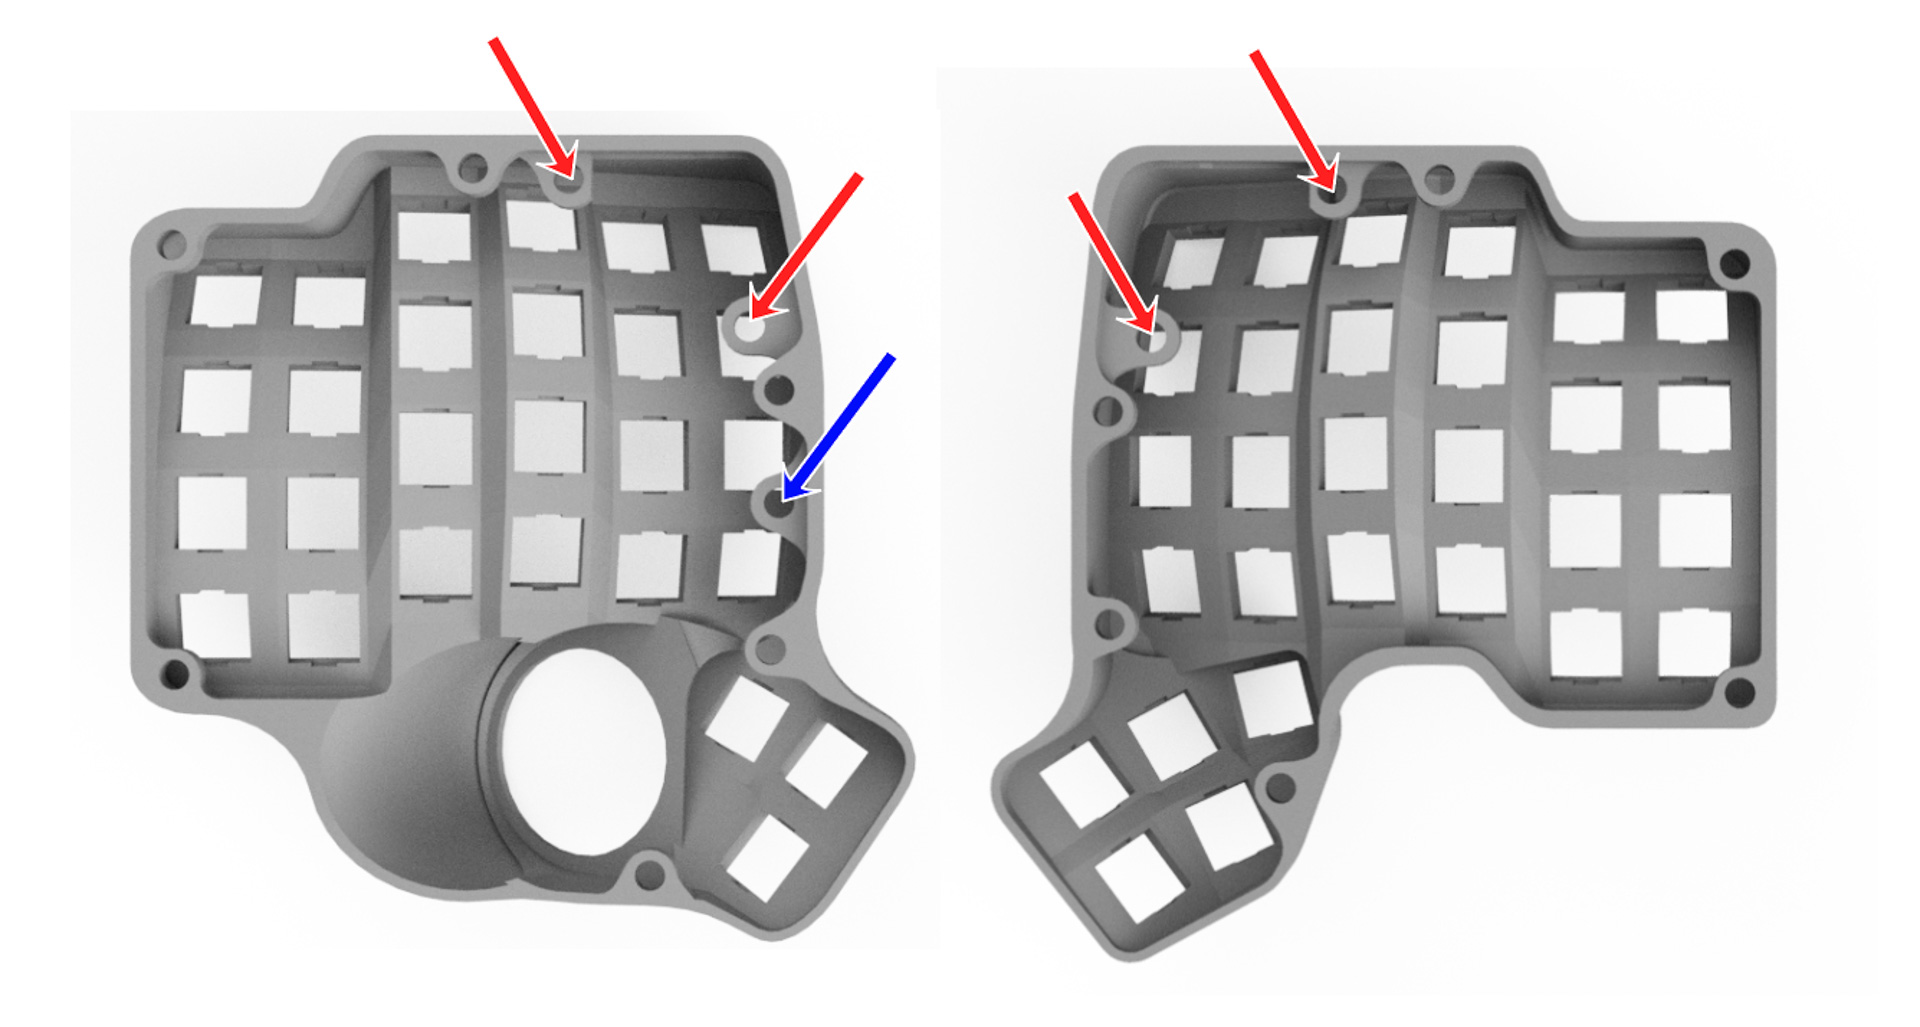
There is a third inner hole at the bottom (in blue). If you are building a left-handed Charybdis, install a screw insert there. Otherwise, you can ignore it.
Follow the same procedure as previously, except:
- with the soldering iron, push the insert all the way in
- be careful not to push the insert too far!
- this time, you don’t need to flip the case.